
When preparing for a roofing job you need more than just a good coil roofing nailer. You also need more than a solid understanding of OSHA safety rules. Whether it be a complete re-shingle or simply a repair, you’re bound to hear talk about a high-wind nailing pattern. This goes double if you live near the coast or anywhere in Florida. In hurricane-prone areas high-wind nailing patterns are mandated by local building codes.
The high wind shingle nailing pattern came about (officially, at least) in 2003. Since then, the International Building Code required roofers to fasten shingles using six nails. You must also properly space nails in front of the seal line. They required these high-wind-rated products on any roofs in wind regions rated at or above 110 mph. Shingle manufacturers now produce products rated somewhere between 60 and 130 mph, using two-hour duration tests.
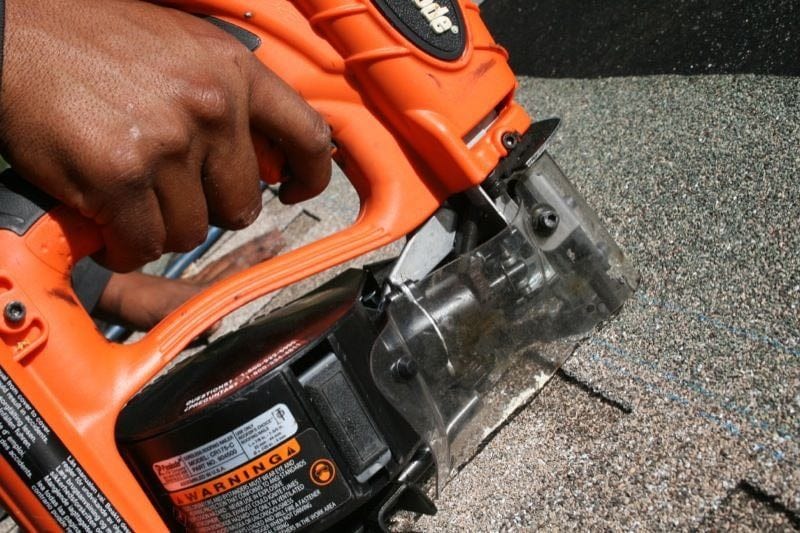
See our article on How to use a roofing nailer.
High Wind Nailing Pattern for 3-Tab Shingles
So what does this high wind nailing pattern look like? On traditional 3-tab shingles it would look like this:
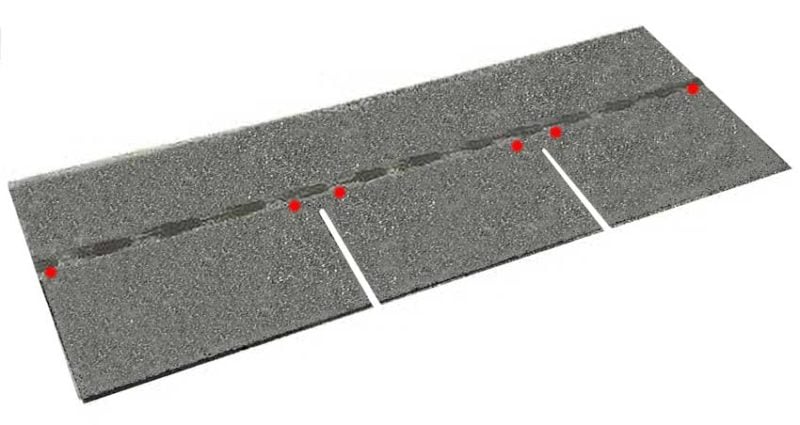
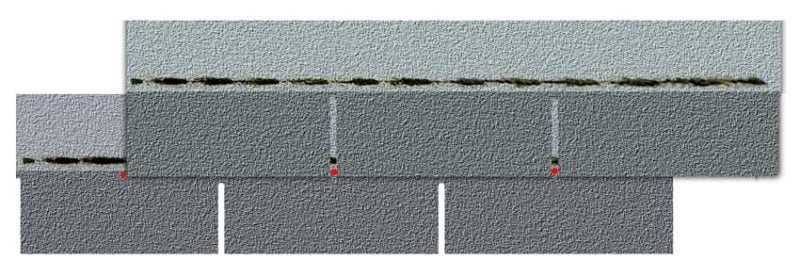
Note that the nails are just below the tar line. Keep your nails on either side of the gap. You want them away from the middle of each individual shingle. That ensures the gap in the shingle above doesn’t expose the nail head underneath. Here is a visual example of what you don’t want:
High Wind Nailing Pattern for Architectural Shingles
For architectural or dimensional shingles, the nailing pattern would look something like this:
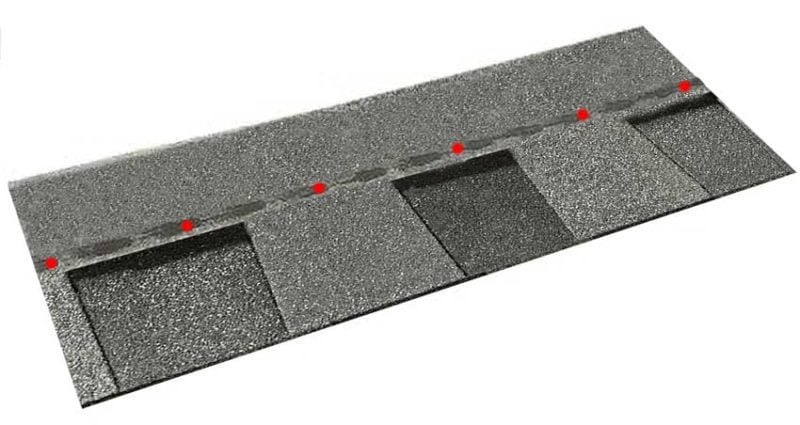
With architectural shingles, you don’t have to worry about nails poking through the gaps. Unlike 3-tab shingles, they use an architectural layer atop a solid layer so no gaps exist. As a result, you simply space out the nails evenly across the width of the shingle. Be sure to keep around 1-inch in from the sides and keep the nails just below the tar line. You also don’t want any nails to appear below the level of the shingle that rests on top of the nails.
Additional Tips for the Work
Some roofing coil nailers have an adjustable shingle guide. This lets you automatically set the position of the nail with respect to the bottom of the shingle. This is extremely handy, though after a while you will likely find yourself, guide-free, nailing away quickly and accurately once you’ve done a couple of rows.
We recommend a 6 nail pattern regardless of whether or not you live in a high-wind area. It simply doesn’t take all that much more effort. Most people use pneumatic roofing nailers, so adding n extra couple of hits takes little effort. The cost certainly isn’t much more either. Take into account the hassle associated with any kind of early roofing material failure, and you’ll probably agree that a little extra time and money spent up front can save a lot of hassle down the road.
