
PTR’s Pros Offer Tips to Teach You How to Cut with a Circular Saw
Whether you just got your first circular saw or you’re looking for some ideas of how to make better cuts, our Pros are here to help you learn how to cut with a circular saw. We also have a few circular saw tips and tricks to help you hone your craft.
How to Cut with a Circular Saw: The Basics
Circular Saw Blade Direction
A standard wood-cutting circular saw cuts by driving the blade up from below the material. You can tell which way to put the blade on by looking at the direction indicator on both the saw blade and the circular saw’s guard. Some blades will go on with the label to the inside of the saw because of the side the blade is on (usually blade-left saws).

Activate the Trigger
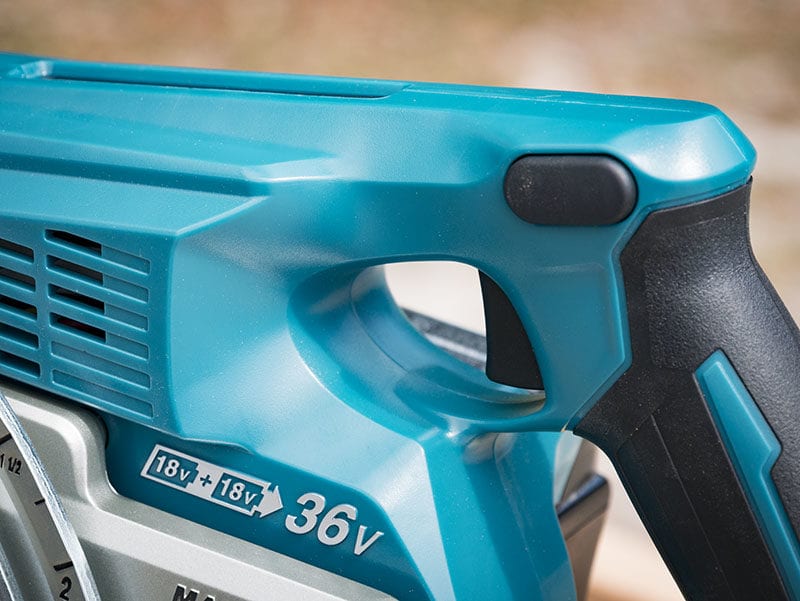
Many circular saws have a two-stage trigger. Within reach of your thumb, you need to either push in or push down the safety while you press the trigger. Some battery-powered saws also have a power button that you need to press first before the trigger is active.
How a Circular Saw Blade Guard Works
As you push the saw forward on its base (the shoe), the guard starts to pivot out of the way and exposes more of the blade as it hits the material you’re cutting.
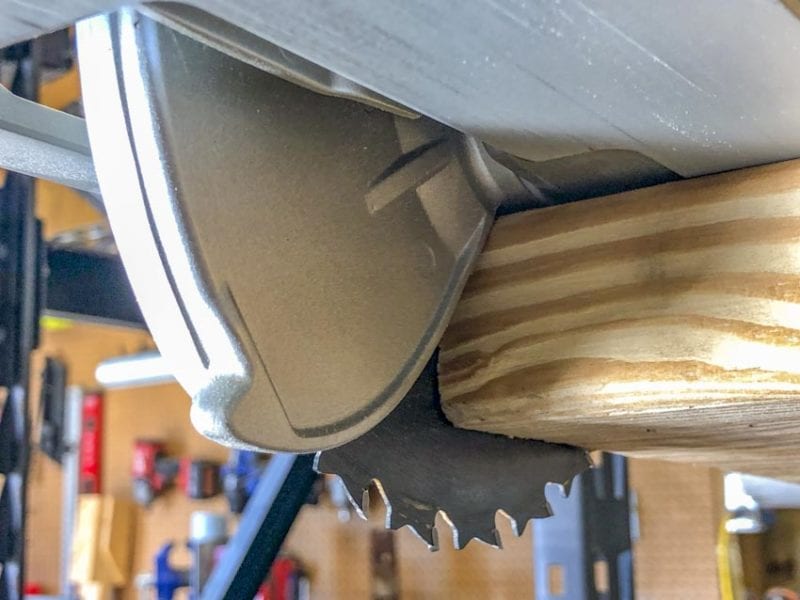
If you feel a hesitation or the saw wants to lift shortly after you start your cut, that’s usually the guard hanging up. Look for the small lever and push it forward to help the guard get started.
When you finish your cut, the guard springs back into its starting position to protect you from the blade.
Following Your Cutline
While you’re cutting, notches in the front give you an easy way to follow your cutline. There are typically two—one for 0º cuts and one for 45º bevel cuts. If you cut at a bevel angle other than those two, the notches aren’t as helpful.
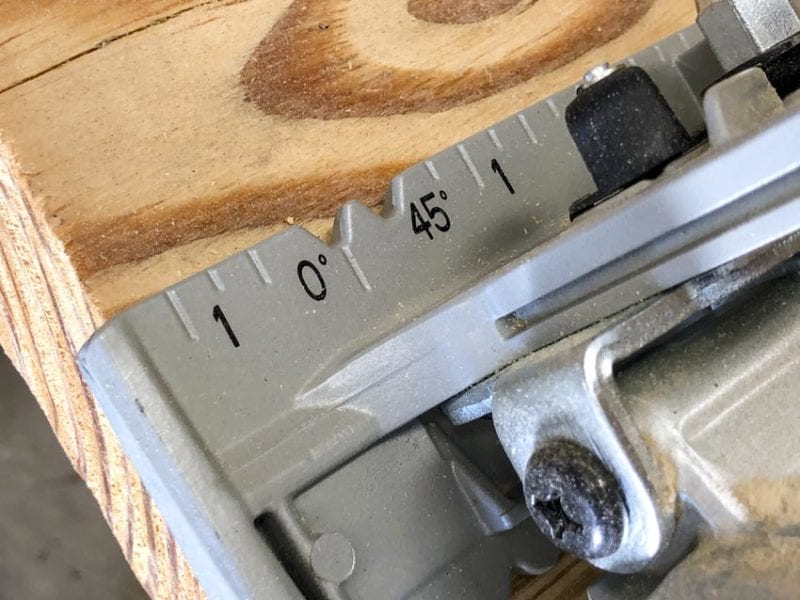
You can also watch the edge of the blade hit your cutline if you like. However, the blade orientation and/or design of the saw’s frame might block your view.
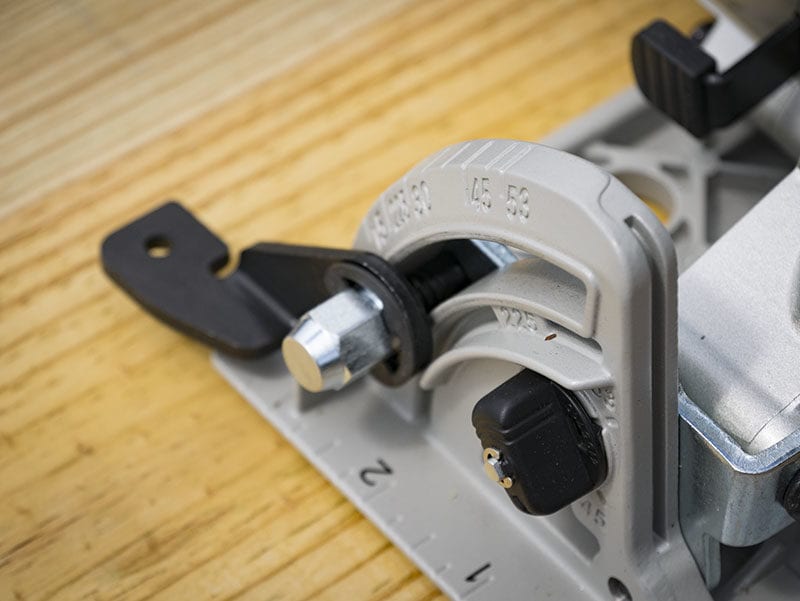
Changing the Bevel Angle
To change the bevel angle, there’s a clamp release at the front of the saw. Simply loosen that and set the angle you want to cut. Some saws even have a stop system to help you find 45º more easily.
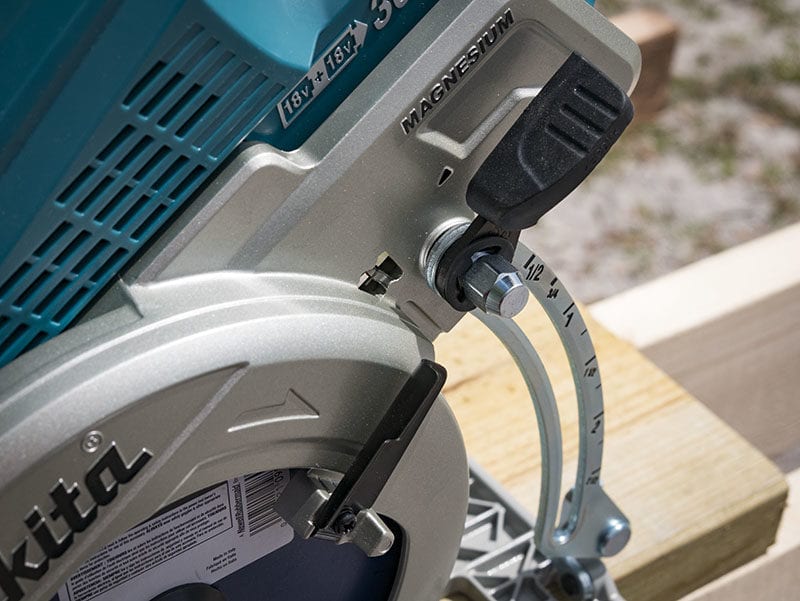
Changing the Blade Depth
You may also want to change the depth of your cut to better fit the material you’re cutting or if you don’t want to cut all the way through the material. The height adjustment is typically near the back of the saw and has a clamp release similar to the bevel release on the front. Many saws have markings on the frame so you know what depth you’re setting the blade to.
As you’re learning how to cut with a circular saw, grab some scrap wood and make a few test cuts. As you learn how the saw feels, you’ll quickly be ready to move forward with more confidence.
How to Cut a Straight Line with a Circular Saw
When you’re making a straight rough cut with a circular saw, many folks do just fine cutting free hand. When you absolutely need it to be straight, it’s time to bring in some help.
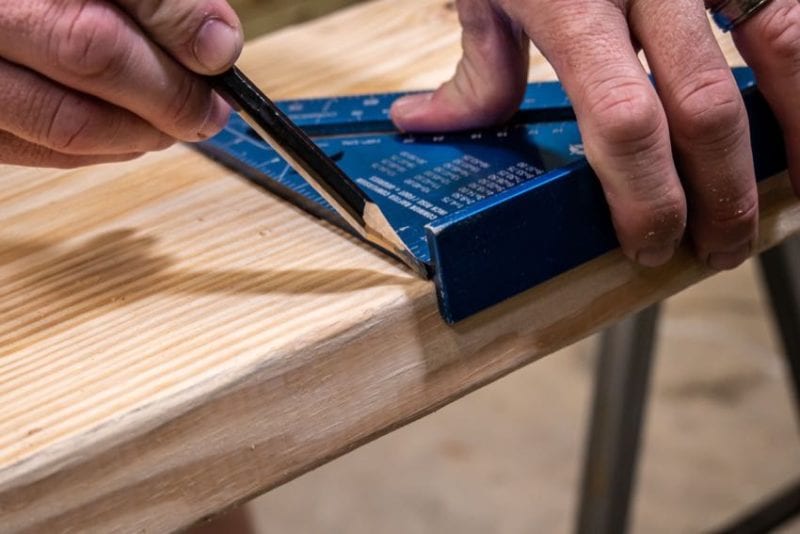
Use a Rafter Square
When you’re making 90º cross cuts or 45º miter cuts, a rafter square is your best friend. Learning how to make a straight cut with your circular saw is as simple as setting the square’s lipped edge against the side with one hand and cutting with the other.
Use a Straightedge
Similar to the rafter square trick for crosscuts, clamping a straightedge down to guide your saw on longer cuts can maintain the accuracy of your cut. A level can also do the job for this circular saw tip.
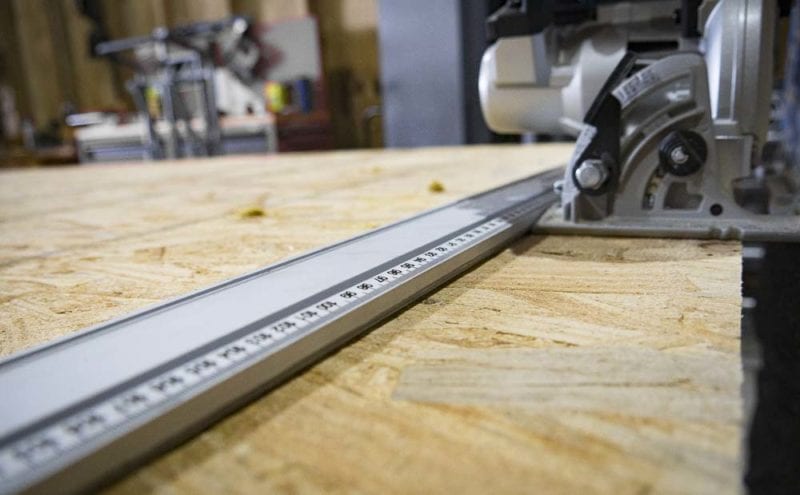
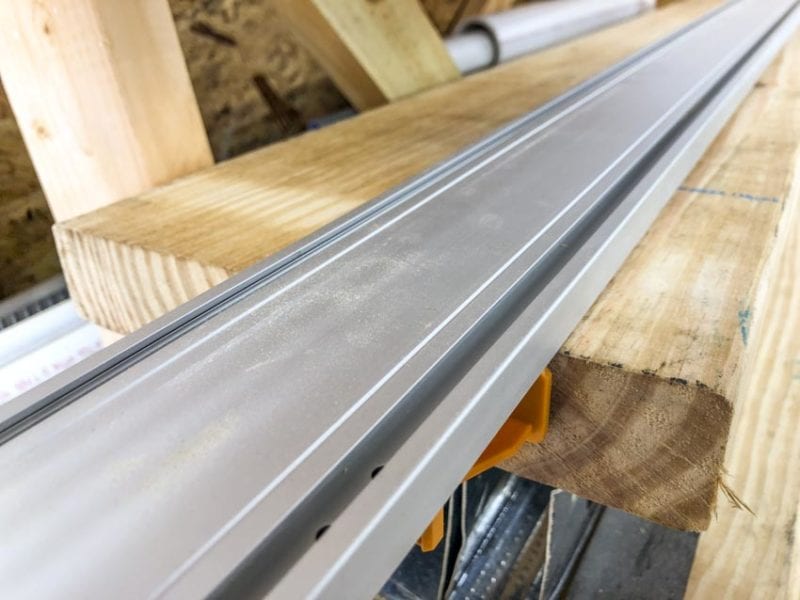
Grab a Track System Add-On
Several brands make tracks you can attach your circular saw to. They vary in quality and none of the ones we’ve tested replace the accuracy of a track saw. That said, it is a good way to get repeatable cuts.
We have more details in this article to help you learn how to make straight cuts with a circular saw.
How to Cut with a Circular Saw: Circular Saw Tips and Tricks
Slow Down
When we did our cordless circular saw shootout, how fast each saw cut was a big part of our data. That’s great for testing power, but not so much for quality results.

When folks ask us how to cut with a circular saw, we always start by suggesting they slow down. If you’re seeing a lot of splintering from tear out and you’re having a hard time following your cutline, slowing down can help. Let the blade and the motor do the work. Your job is just to captain the ship and guide its path.
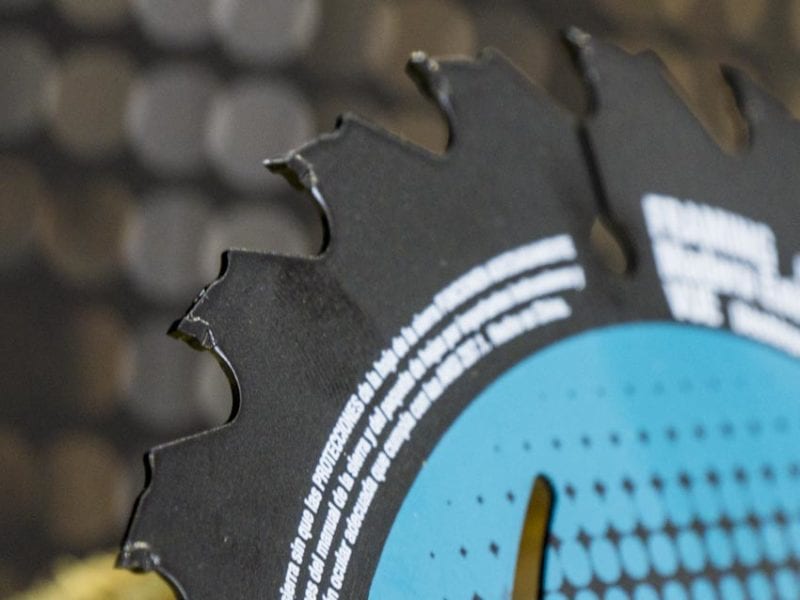
Increase the Tooth Count
As you move from rough cuts to finish cuts, go with a higher tooth count on your blade. The higher the tooth count, the smoother the finished cut. Some high-quality blades can leave you with a finish close to that of 220 grit sandpaper. They cost more, so only use them when you need to.
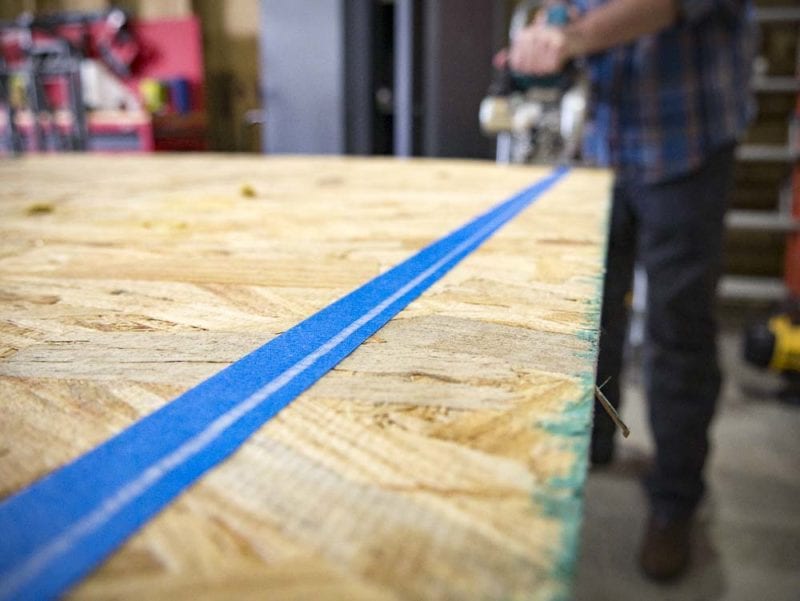
Reduce Tear Out…Without a Track Saw
If you’re doing carpentry level finish work, a track saw is often your best bet to get the finest finish. But that’s not a tool that every DIYer owns or even every Pro. One of our circular saw tips is to stick a piece of masking or painter’s tape over your cutline to reduce tear out. You’ll have to mark your line over the tape, but you’ll get a better finish.
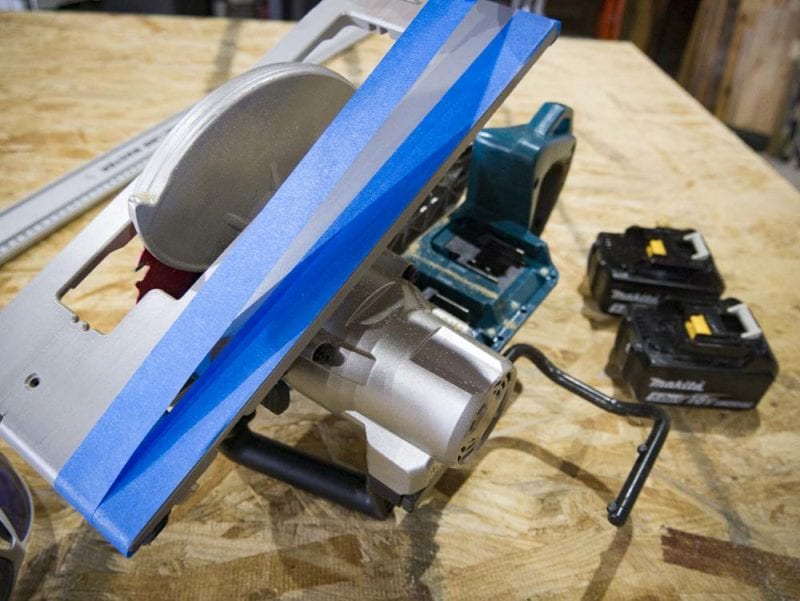
Tape the Shoe to Avoid Marring the Material
We’re not talking about throwing duct tape around the upper and outsole to keep your shoes held together. This is a circular saw tip for when you’re working on a finished surface that you don’t want to mar. Covering the bottom of your circular saw’s shoe with painter’s tape helps it glide over your finished surface easier and avoids scratching it up.
Flip the Material
As you’re learning how to cut with a circular saw, place the side that will be showing facedown. Tearout occurs on the back of the cut on the top facing side, so flipping the good side down puts any tear out you get on the part that won’t show.
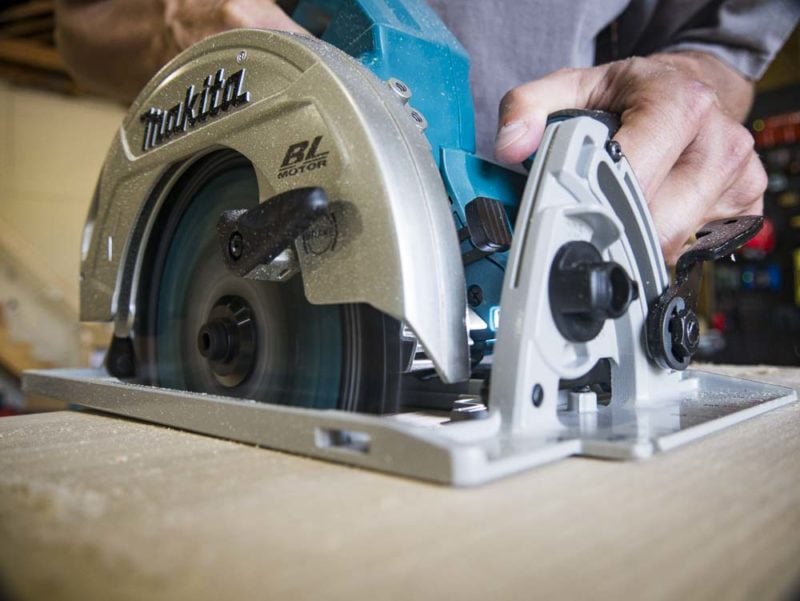
Like the saw in our photos? It’s Makita’s 18V X2 Cordless Rear Handle Saw (XSR01). Check out the review here or order one for yourself below!
Have any circular saw cutting tips you’d like to share? Let us know in the comments below!
